
Copyright © All rights reserved. Made by Mad Dwarf Productions. Terms of use | Privacy policy
A Walk-Through of Various Techniques
Step-By-Step Guide
To illustrate the various techniques used, this guide will take you through building a cocktail stick barricade, focusing on the detail of the methods used.
Brushes: For large areas of PVA, a 1” round brush works best . A second large brush for painting the base will be needed, along with a smaller one for details. Smaller again, the barricades will need to be painted with a detail brush.
Glue: Large tub of PVA, and a container for watering down. (Yogurt tubs work well)
Flock: A bag of artificial grass, and maybe some sand for paths.
Paint: Tester-pots from DIY stores can be good for bases. Lots of green, and some brown. Grey can be useful.
A Base: An old CD works for this. Advanced modellers may use a small wooden disc with bevelled edges.
Polystyrene: Often used in packing, this is an invaluable material for modelling!
Cocktail Sticks: Matches, lolly sticks and coffee stirrers also work.
Craft Knives: These sharp blades come in two styles - replaceable-blade scalpels and extendable-blade “snap-offs”.
Spray Paint/Rough Coat: We will not be using these in this tutorial.
Bitz Box: Always needed!
Water: A small jar to wash brushes in. PVA brushes should be rinsed thoroughly under a running tap
Things you will need:
 To begin, find a workspace where you can build your models, and leave them to dry
as needed. Use newspaper or other protective layers to ensure paint and glue do not
accidentally spill onto valuable surfaces.
Collect together all the resources you will need, and organise them around your workspace.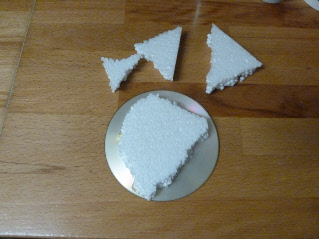
The actual modelling begins with the base, and a plan of what the final piece will
look like. Snap the polystyrene to approximately the right size and shape. It is
best to keep it a little bigger than needed - you can always take more off! The rounded
granules make a good cliff face/rock edge, and the back will be smoothed down. Decide
where you would like the barricades to be, and mark with a felt-pen. You are now
ready to shape the polystyrene.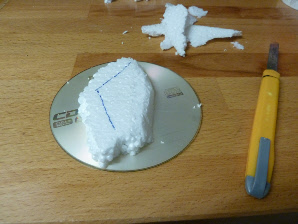
Take the polystyrene, and using an extendable snap-off knife, make long, smooth cuts, shaping one side of the piece. Take this slowly, and be careful not to cut too much off. A short, angled slope is easiest to make. As you remove small, thin strips of polystyrene, they will gain a small static charge, just enough to make it stick to your fingers. Be careful with that sharp knife as you flap at them! Excess pieces should be kept for later projects.
Sharp edges of polystyrene should be smoothed and rounded by shaving the edges. Repeat as necessary, but be careful not to pull chunks off as you cut.
Once the polystyrene is the correct shape, it can be glued to the base. Be generous with the glue, brushing it right to the edges of the polystyrene, and make sure the polystyrene is pressed solidly down onto the base. It is best to weight it while it dries - I tend to use the PVA tub! It can take several hours to dry, so make sure the weight is balanced, and will not fall over! Place the piece in an area that will not be disturbed.
REMEMBER:
Put away your extendable knife-blade
and wash your PVA brush!
